Guides
Mobile Detailing Rustproofing Packages Canada: The 7 Steps
Mobile detailing rustproofing packages Canada: the seven-step application sequence, three visible checks, and fixes for a blocked drain or overspray.
What to take away
- Rustproofing is an add-on you apply after the wash, never before it. Salt, grit and old flaking product must come off first or the new coat traps moisture.
- In mobile detailing rustproofing packages in Canada, what the customer buys is the named product, the areas you coat and the re-check afterward — sold on its own or paired with your winter tier.
- The step that decides the result is drying and inspecting the underside. A wet seam or a missed rocker panel ruins the job.
- You can check your own work with three visible testsa flashlight sweep, a finger wipe on a control spot, and a re-check of drain holes.
- When a panel is already perforated or a seam is soft to the touch, stop and send the vehicle to a body shop.
- Charge the add-on as a separate line, and confirm how it is taxed in your province before you quote.
Why this add-on sells in Canada
Road salt is the reason. Ontario and Quebec spread heavily through the winter, and a vehicle that sees one season of that brine starts corroding in seams, inside doors and along the rear subframe. Road salt explains how chloride attacks steel once it sits in a crevice with water.
Most US detailers never touch this work. In Canada it is a recurring purchase with real search volume, which is why it belongs on the menu beside your wash tiers. Which Add-On Services Belong on a Mobile Detailing Menu? covers how to slot it in without crowding the core packages.
The chemistry is simple. Corrosion needs oxygen, moisture and bare metal in contact. Rustproofing works by breaking that contact, either with a film that stays soft or a hard coating that seals. Soft-film products are sold in Canada under names like Krown, Rust Check, Corrosion Free and Fluid Film, and the label on each one governs its set time.
What has to be true before the first step
Four things, and none of them are optional: the underside is free of salt, grit and old flaking product; every seam, door bottom and box section is dry; the metal is sound, with no perforation and no soft seams; and your insurance covers every area you plan to coat.
Pre-Start Rustproofing Readiness
- Vehicle washed, underside and arches clear
- Surface dry to touch, not towel-dry
- Owner written approval for product and areas
- Product cure behaviour matches forecast temperature
If any one of those is false, you are not ready. Say so and reschedule.
The sequence
- Pre-rinse the underside and arches with a wand, working front to rear.
- Wash the panels and dry the body, then blow the seams and drain holes clear with compressed air.
- Inspect from a creeper with a bright light. Mark existing rust, bare metal and previous coating with tape.
- Mask brakes, exhaust, sensors, wiring looms and any rubber boot you do not want coated.
- Apply the product with an undercoating gun and a flexible wand to seams, inner arches, rocker panels, door bottoms and the rear subframe, in that order.
- Wipe overspray off the body immediately with a clean cloth.
- Let the film set per the label, then re-check drain holes and remove masking.
The step that decides the result
Step three, the inspection, is where the job is won or lost. A detailer who skips it sprays over a wet seam and seals moisture against steel. That is worse than doing nothing.
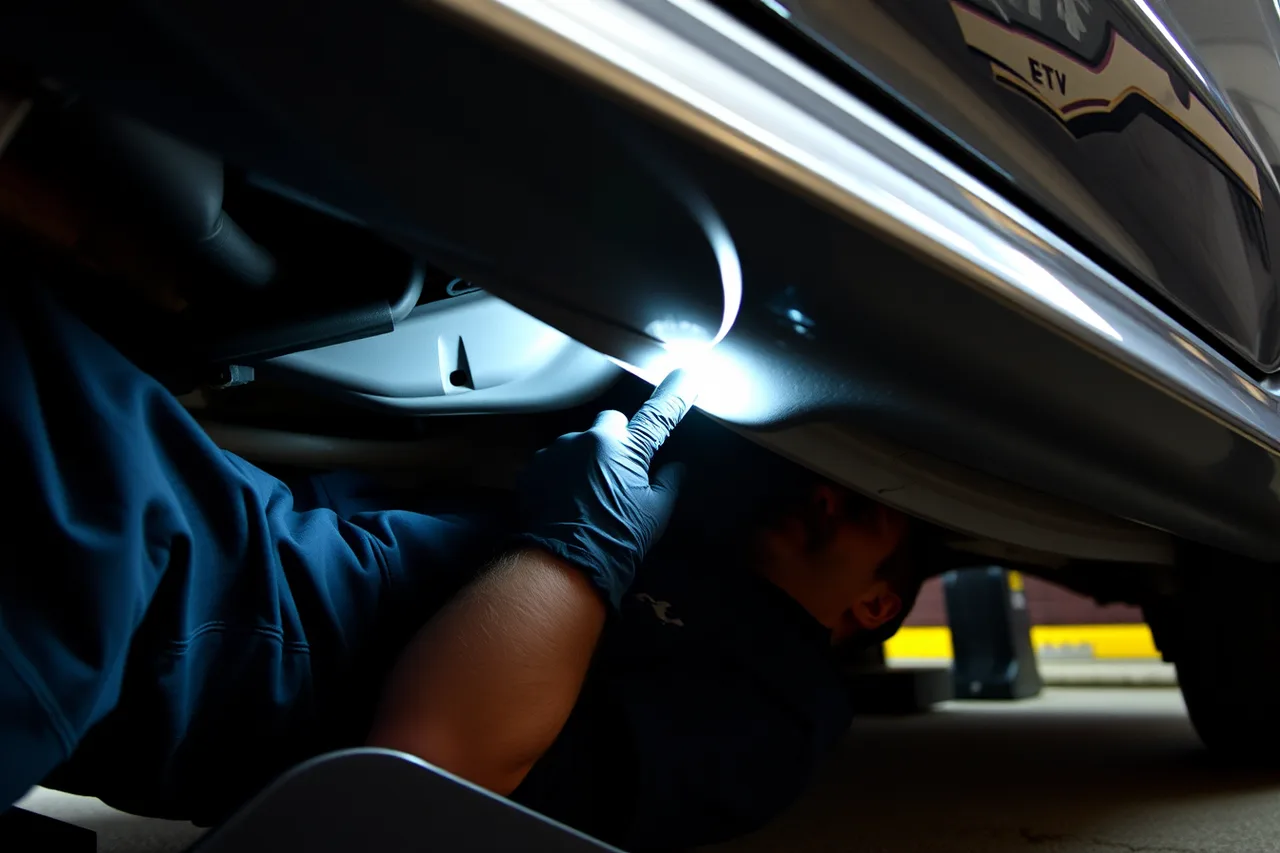
Use a creeper and a light that reaches into the arches. Run a gloved finger along a seam. If the metal feels soft, or you can push a pick through it, stop the job.
A coating over perforated metal hides the problem from the customer for a season and then fails from the inside out.
How to check each step came out right
Three checks, all visible.
- Flashlight sweepwalk the underside with the light at a low angle. Every seam should show a continuous wet-looking film, no dry patches, no puddles.
- Finger wipetouch a control spot on the rocker panel. The film should feel tacky, not dripping. A drip means you applied too heavy.
- Drain checkpour a cup of water into each door drain and watch it run clear. A blocked drain means you coated over it and have to clear it now.
If you want a second pair of eyes on this, the approach in Quality control in a mobile detailing business: how owners check the work is worth copying for add-ons as well as washes.
What to do when a step goes wrong
The common failure is a blocked drain hole or a coated brake component. Both are recoverable, but only if you catch them before the vehicle leaves.
For a blocked drain, clear it with a plastic pick and a burst of air, then re-check with water. For overspray on a brake disc or caliper, wipe with the manufacturer's solvent and test the brakes at low speed in the lot before handover. Never let a vehicle go out with product on friction surfaces.
If the film is too heavy and sagging, wipe the excess with a lint-free cloth while it is still wet. Once it skins over, you are removing it with solvent, which costs you time.
When to stop and hand it to a professional
Hand the vehicle to a body shop when you find perforation, a soft seam, or rust that has lifted paint on a structural panel. That is a repair, not a coating job.
A second condition: if the customer wants a warranty-backed product applied inside box sections, and your insurance does not cover that work, refer it out. The two main methods are soft films that stay pliable and hard coatings that seal the seam, so you can describe the difference when a customer asks.
Booking and paperwork notes
Treat the add-on as its own line on the invoice, with the product named and the areas covered listed. Fleet clients will want that for their records, and the scope wording in fleet and rideshare detailing contracts shows how to write it so a coating dispute does not become a redo.
Before you quote, confirm the tax treatment in your province. The Canada Revenue Agency page on charging and collecting GST/HST sets out which rate applies where, and Charging GST and HST on Mobile Detailing in Canada walks through how that lands on a package plus add-on.
Seasonality matters too. Most Canadian demand lands between the first salting and the spring melt, so pair the add-on with your winter tier. What to Put in a Canadian Winter Mobile Detailing Package shows the pairing.